
4n6ir.com
NTFS Object IDs in EnCase - Part 2
by James Habben
I posted previously about how to view the Object ID values, stored by NTFS, using EnCase as a forensic tool. In this post, I will show you a method to identify the files in your case that have an Object ID assigned to them. You can follow this using EnCase v7 or v8.
Using EnCase Conditions to Find Object IDs
This method requires a user-built custom condition because EnCase doesn’t have any in the default set to search for these values. Because the Object IDs are shown in the attributes tab of EnCase, it makes for a little more advanced condition than the typical. Here is how to build that condition:
- Find the conditions pane in the bottom right corner and click on the ‘user’ folder. Use the ‘new’ option in the toolbar or mouse right click to open the condition dialog. I created a folder to organize a bit. EnCase throws an error if you try to create a new condition in the ‘default’ folder.
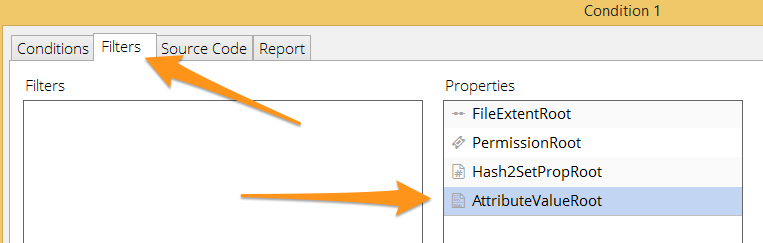
- Click on the ‘filters’ tab and then double click on the ‘AttributeValueRoot’ item in the list.
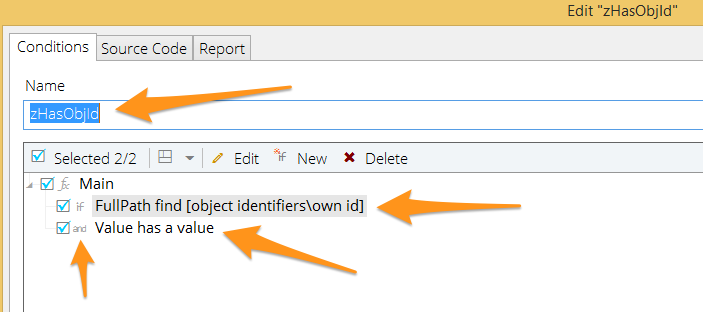
- Four things to do in this window. We need to give this a unique name since it will show up in the property list later. I chose to use the FullPath property to reduce false positives over using a name only check. The path I used is based on what EnCase displays when viewing in the attributes tab of the details pane.
- Name mini-filter ‘zHasObjId’
- Use ‘new’, choose ‘fullpath’, choose ‘find’, type ‘object identifiers\own id’ in the value
- Use ‘new’, choose ‘value’, choose ‘has a value’
- Right click on the ‘Main’ item at the top of the tree and use ‘change logic’ to flip the ‘or’ to ‘and’
- Click ‘ok’ to save it
- Back on the main condition window, click on the conditions tab.
- Use the ‘new’ option
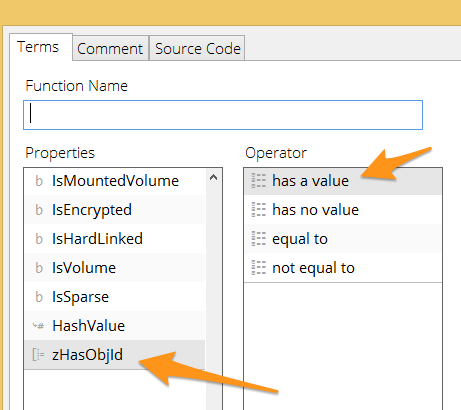
- Scroll to the bottom of the list and click on ‘zHasObjId’
- Click on ‘has a value’
- Click ‘ok’
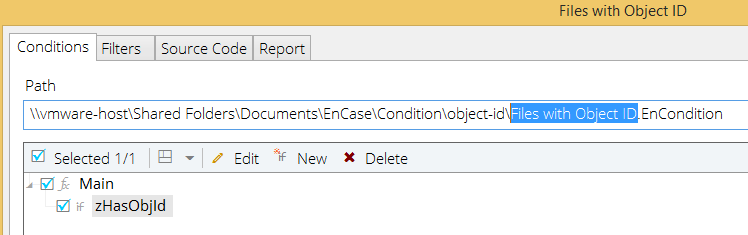
- Name your condition and click ‘ok’
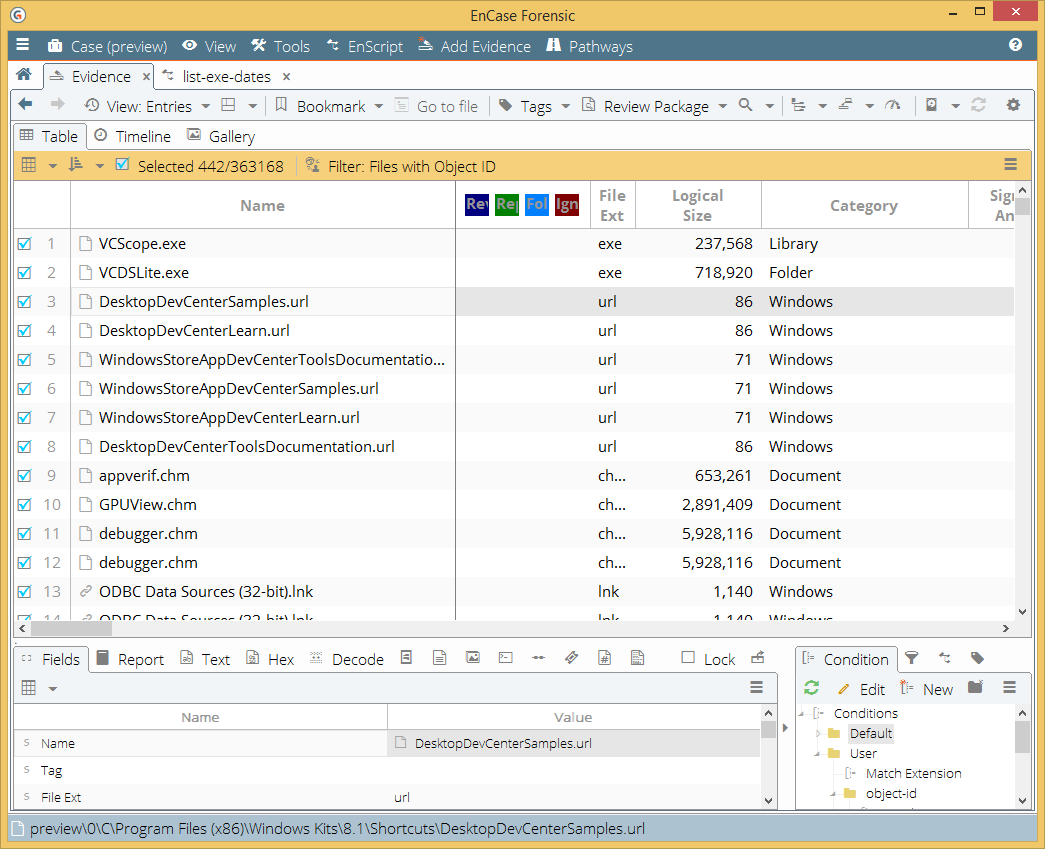
It is ready to use now. This condition is doing an extra lookup for every file in your case and it causes the operation to take a bit longer. Be patient and it will finish. If you haven’t changed any settings with the view after running a condition, it will come back without the tree pane. I used the ‘ctrl+space’ shortcut to have EnCase blue-check everything in the view. As you can see, I have 442 out of 363,168 files on this disk with Object IDs associated in NTFS.
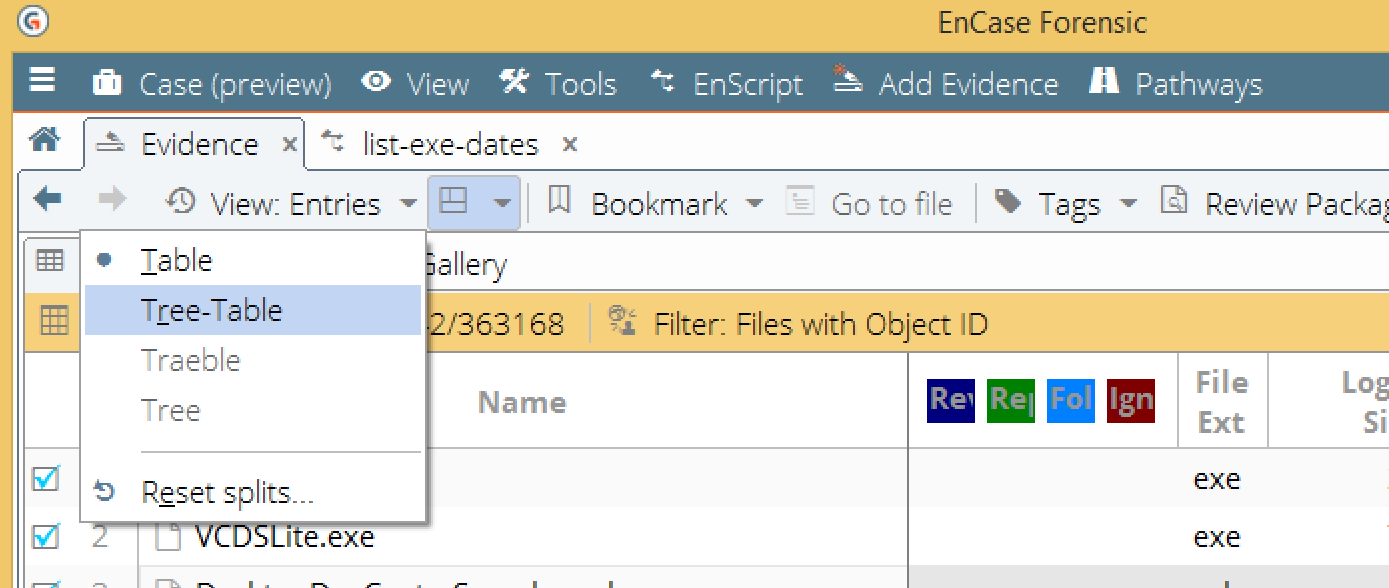
You can change from the table-only view with an easy fix. Just use the drop down and select ‘tree-table’.
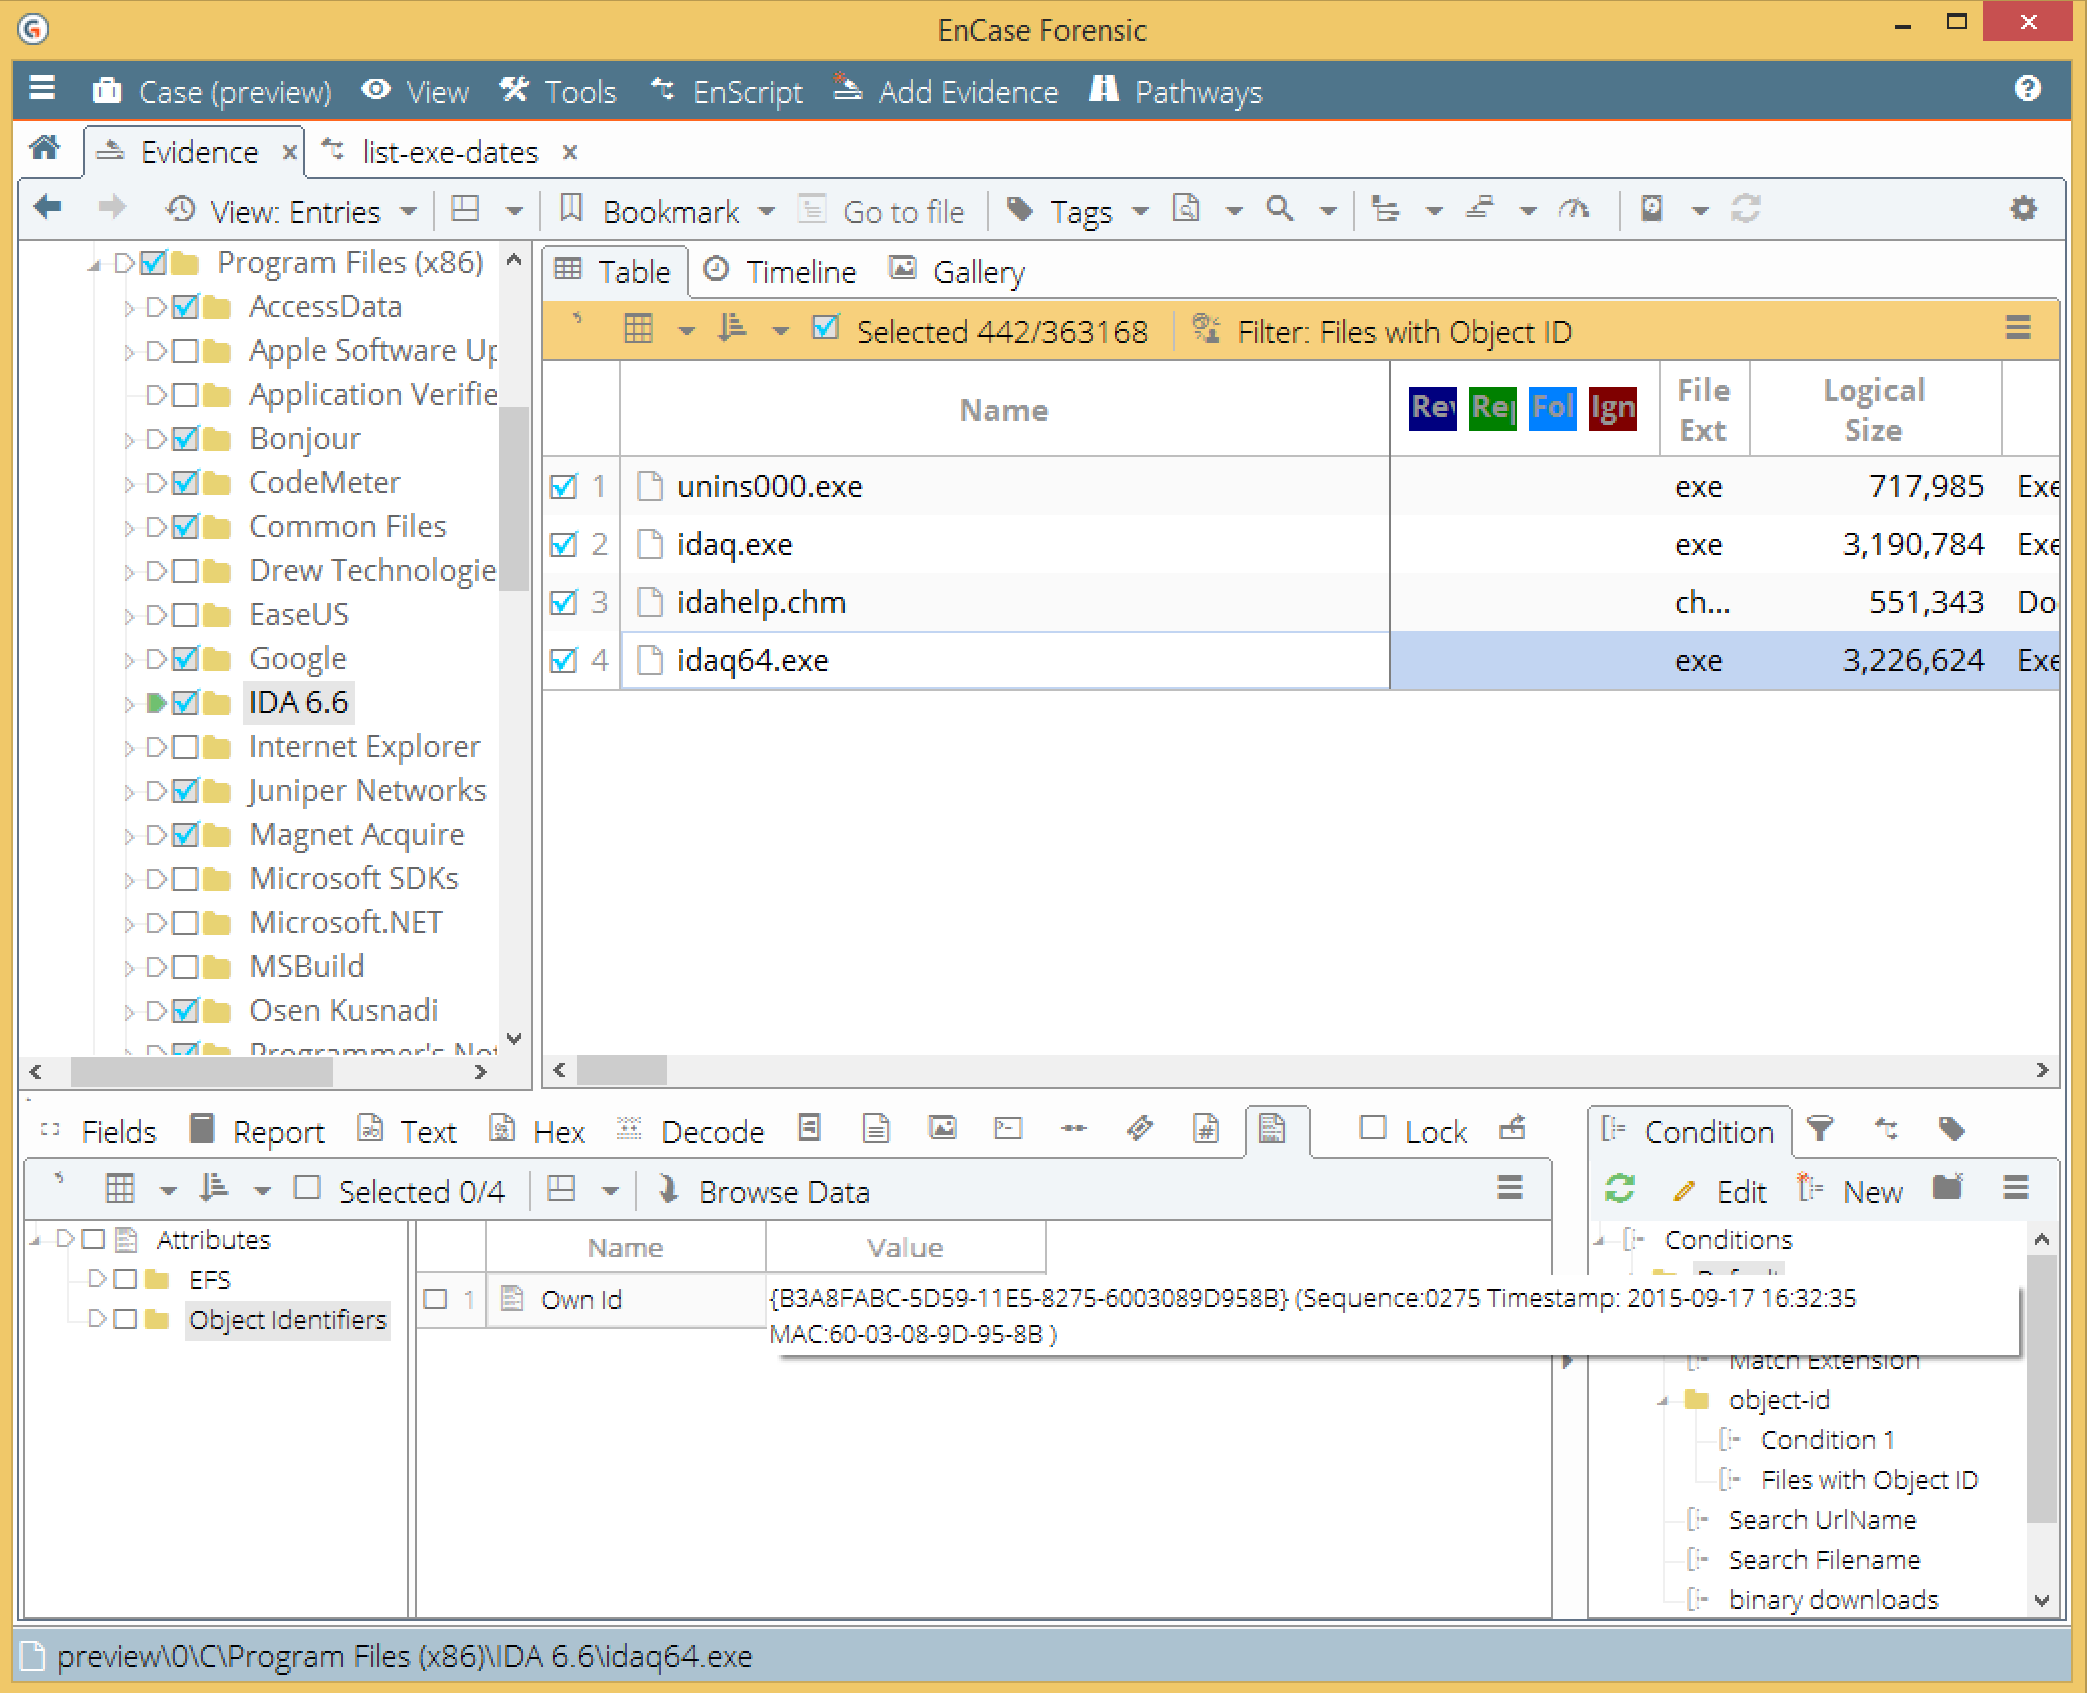
Click on the attributes tab in the bottom pane, and you get the same view as before.
Next post will be another condition that will allow you to search for a partial or full Object ID value across the evidence in your case. Let me know if you have any questions or other thoughts on something to filter on.
James Habben
tags: EnCase